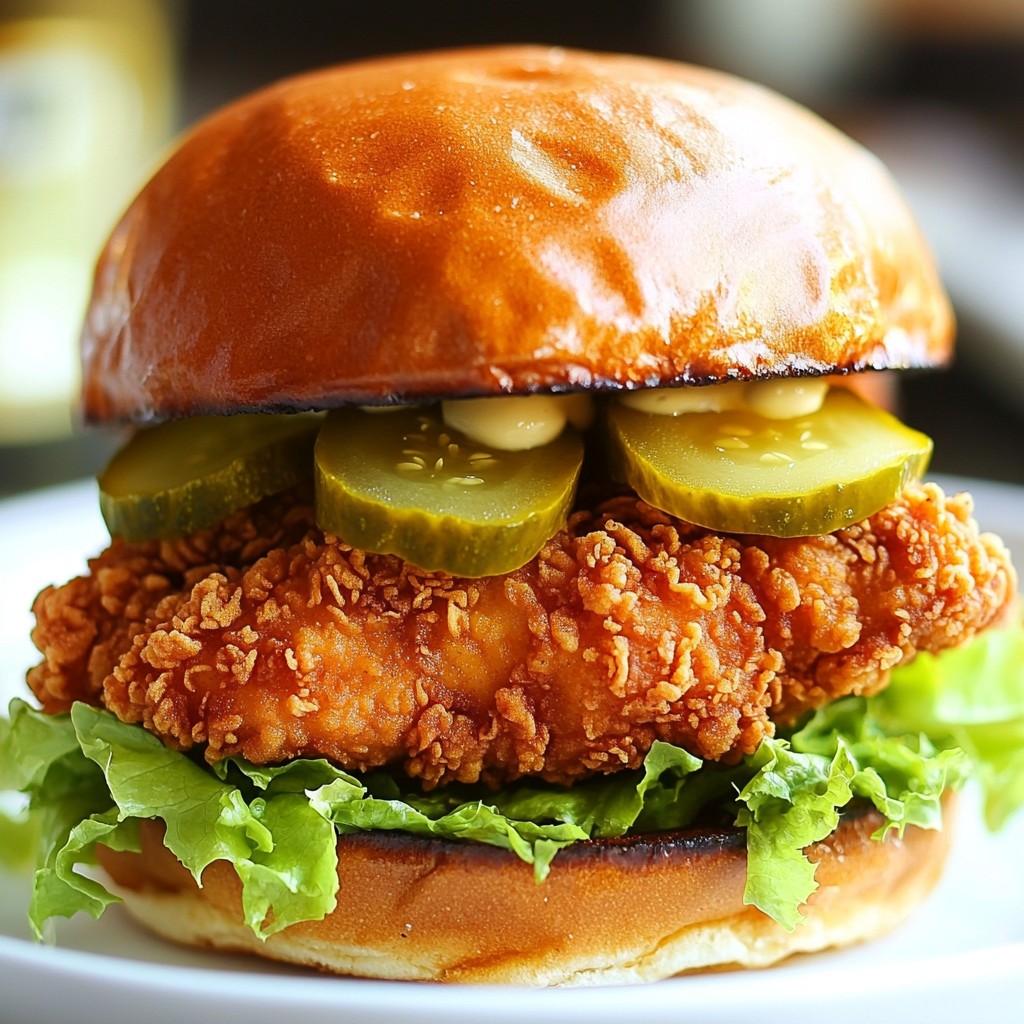
Craving Chick-fil-A but stuck at home? I have the perfect solution! With my Crispy Chick-fil-A at Home Chicken Sandwich recipe, you can make your favorite meal right in your kitchen. This guide is simple and fun, with easy steps to follow. Let’s get started so you can enjoy that delicious crunch and juicy flavor anytime. Say goodbye to takeout and hello to homemade goodness!
Why I Love This Recipe
- Flavorful Marinade: The buttermilk and hot sauce create a tender, flavorful chicken that is perfect for frying.
- Crispy Coating: The seasoned flour mixture results in a perfectly crispy exterior that rivals your favorite fast-food sandwich.
- Customizable Toppings: With options like dill pickles, lettuce, and tomato, you can personalize each sandwich to your liking.
- Easy to Make: This recipe is straightforward, making it perfect for both novice and experienced cooks alike.
Ingredients
Main Ingredients
- 2 boneless, skinless chicken breasts
- 1 cup buttermilk
- 1 tablespoon hot sauce (optional)
- 1 cup all-purpose flour
- 2 cups vegetable oil (for frying)
- 4 hamburger buns
Seasoning Mix
- 1 teaspoon paprika
- 1 teaspoon garlic powder
- 1 teaspoon onion powder
- 1 teaspoon black pepper
- 1 teaspoon salt
- 1/2 teaspoon cayenne pepper (adjust for spice level)
Optional Toppings
- 4 tablespoons mayonnaise
- Dill pickles
- Leafy lettuce
- Sliced tomato
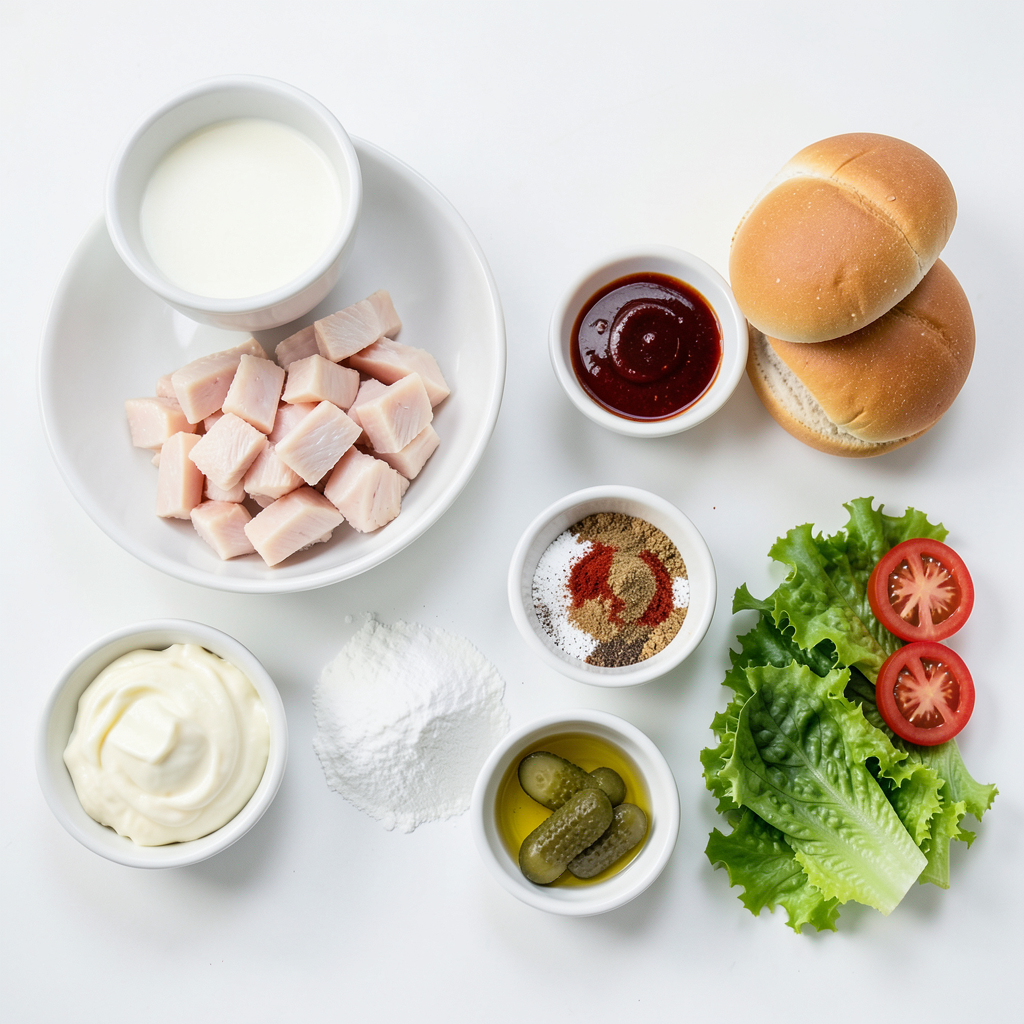
To create a delicious Crispy Chick-fil-A at Home Chicken Sandwich, gather these fresh ingredients. The chicken breasts are the stars of the show, while the buttermilk adds moisture and flavor. The optional hot sauce gives a nice kick, but you can skip it if you prefer.
The seasoning mix is key to the sandwich’s taste. Each ingredient adds depth and warmth. Paprika gives color, garlic and onion powders add savoriness, while black pepper and salt enhance flavor. The cayenne pepper provides a little heat, which you can adjust to your liking.
Don’t forget the toppings! Mayonnaise adds creaminess, and dill pickles bring a tangy crunch. Leafy lettuce and sliced tomato add freshness and color. Customize your sandwich with these options to make it your own. Enjoy the process of making this tasty meal!
Step-by-Step Instructions
Marinating the Chicken
Start by making the marinade. In a bowl, mix 1 cup of buttermilk with 1 tablespoon of hot sauce, if you like spice. This adds flavor and keeps the chicken juicy. Place the two boneless, skinless chicken breasts into the bowl. Cover it and let it sit in the fridge for at least 2 hours, or overnight for the best taste. The longer it marinates, the better the flavor.
Preparing the Coating
Next, gather your coating ingredients. In a different bowl, combine 1 cup of all-purpose flour, 1 teaspoon of paprika, 1 teaspoon of garlic powder, 1 teaspoon of onion powder, 1 teaspoon of black pepper, 1 teaspoon of salt, and 1/2 teaspoon of cayenne pepper. Adjust the cayenne for more or less heat. Mix well to blend all the spices. This coating will give the chicken its crunchy texture.
Cooking the Chicken
Now it’s time to cook! Heat 2 cups of vegetable oil in a deep skillet or Dutch oven over medium-high heat. You want it to reach 350°F (175°C). Test the oil by dropping a bit of the flour mix in it. If it bubbles, it’s ready! Take each chicken breast out of the marinade, letting the excess drip off. Dredge the chicken in the flour mixture, coating it well. Shake off any extra flour and let the coated chicken rest for about 5 minutes.
Carefully place the chicken in the hot oil. Don’t overcrowd the pan; fry them in batches if needed. Cook for about 6-8 minutes on each side until they turn golden brown. Use a meat thermometer to check that the inside is 165°F (75°C). Once cooked, transfer the chicken to a plate lined with paper towels to drain the oil. Enjoy the crispy goodness!
Tips & Tricks
Achieving Perfect Crispiness
To get that perfect crunch, you must coat your chicken well. Use the flour mix and cover every bit. Let it rest for five minutes after coating. This helps the flour stick better. Fry it in hot oil for the best crisp. A good rule is to keep the oil at 350°F (175°C). If it's too cool, your chicken will soak up oil and get soggy.
Recommended Marination Time
Marinating is key for flavor and juiciness. Aim for at least two hours. If you can, let it marinate overnight. This not only adds taste but also keeps the chicken moist. The buttermilk tenderizes the meat well. The longer you marinate, the better the result.
Frying Best Practices
Fry the chicken in batches. Avoid crowding the pan; this keeps the oil hot. Cook for six to eight minutes on each side. Use a meat thermometer to check for doneness; it should hit 165°F (75°C). After frying, place the chicken on paper towels. This drains excess oil and keeps it crispy.
Pro Tips
- Marination Matters: Allowing the chicken to marinate in buttermilk for longer enhances tenderness and flavor. Overnight is ideal!
- Perfect Coating: For an extra crispy texture, double dip the chicken by repeating the buttermilk and flour steps.
- Oil Temperature Check: Use a kitchen thermometer to ensure your oil is at 350°F (175°C) for perfectly golden fried chicken.
- Resting Time: Allow the fried chicken to rest on paper towels to absorb excess oil, keeping the coating crispy.
Variations
Healthier Options
You can make a lighter version of this crispy chicken sandwich. Instead of frying, try baking! Preheat your oven to 400°F (200°C). After coating the chicken, place it on a baking sheet. Use a little oil spray to help it crisp up. Bake for about 20-25 minutes or until golden and cooked through. This method cuts down on fat but keeps the flavor.
Spicy Version
For those who love heat, add more cayenne pepper to the seasoning mix. You can also use spicy hot sauce in the buttermilk. If you want extra spice, try adding sliced jalapeños or pepper jack cheese on the sandwich. This gives it a kick that will wake up your taste buds!
Alternative Breading Techniques
You can switch up the breading if you want something different. Try using crushed cornflakes or panko breadcrumbs for a unique crunch. For a gluten-free version, use gluten-free flour or breadcrumbs. These options add variety while keeping your sandwich delicious and satisfying.
Storage Info
Storing Leftovers
To store leftover chicken sandwiches, place them in an airtight container. Keep the sandwiches in the fridge for up to three days. If you store only the chicken, wrap it in plastic wrap or foil. This keeps it fresh and safe to eat later.
Reheating Tips
When reheating, use an oven for the best results. Preheat your oven to 350°F (175°C). Place the chicken on a baking sheet and cover it with foil. Heat for about 10-15 minutes. This keeps the chicken crispy. You can also use an air fryer. Set it to 350°F (175°C) and heat for about 5-7 minutes.
Freezing Instructions
To freeze the chicken, let it cool completely first. Wrap each piece in plastic wrap, then place them in a freezer bag. They can last up to three months in the freezer. When ready to eat, thaw in the fridge overnight before reheating.
FAQs
Can I use chicken thighs instead of breasts?
Yes, you can use chicken thighs. They stay moist and tender. Thighs have more fat, adding rich flavor. Just make sure to adjust cooking time. They might take a bit longer to cook through. Always check for an internal temperature of 165°F. This ensures they are safe to eat.
How do I make the chicken sandwich gluten-free?
To make this sandwich gluten-free, swap all-purpose flour with a gluten-free flour blend. Many brands offer blends that work well for frying. Just make sure they are labeled gluten-free. You can also check for gluten-free buns. This allows everyone to enjoy this tasty meal.
What can I substitute for buttermilk?
If you don’t have buttermilk, you can make your own. Mix 1 cup of milk with 1 tablespoon of vinegar or lemon juice. Let it sit for 5-10 minutes. This will create a similar tangy flavor. You can also use yogurt or sour cream mixed with water. This gives you a great alternative for soaking the chicken.
You now know how to make crispy, tasty chicken. We discussed the main ingredients, seasoning, and optional toppings. Step-by-step, I showed you how to marinate, coat, and cook the chicken. You learned tips for perfect crispiness and storage options for leftovers.
Try the variations to make different flavors. Once you master this dish, you'll impress family and friends. Enjoy your delicious chicken, and don't forget to share your results!